This site uses cookies to improve your experience. To help us insure we adhere to various privacy regulations, please select your country/region of residence. If you do not select a country, we will assume you are from the United States. Select your Cookie Settings or view our Privacy Policy and Terms of Use.
Cookie Settings
Cookies and similar technologies are used on this website for proper function of the website, for tracking performance analytics and for marketing purposes. We and some of our third-party providers may use cookie data for various purposes. Please review the cookie settings below and choose your preference.
Used for the proper function of the website
Used for monitoring website traffic and interactions
Cookie Settings
Cookies and similar technologies are used on this website for proper function of the website, for tracking performance analytics and for marketing purposes. We and some of our third-party providers may use cookie data for various purposes. Please review the cookie settings below and choose your preference.
Strictly Necessary: Used for the proper function of the website
Performance/Analytics: Used for monitoring website traffic and interactions
He'd been selling kits for his mount in small numbers. I'd read about such friction-drive arrangements and had followed the work of a cyclist in Australia known as Kepler who had devised a clever articulated mount that allows the motor to retract from the wheel when not applying power. I thought: "What could be easier?".
He'd been selling kits for his mount in small numbers. I'd read about such friction-drive arrangements and had followed the work of a cyclist in Australia known as Kepler who had devised a clever articulated mount that allows the motor to retract from the wheel when not applying power. I thought: "What could be easier?".
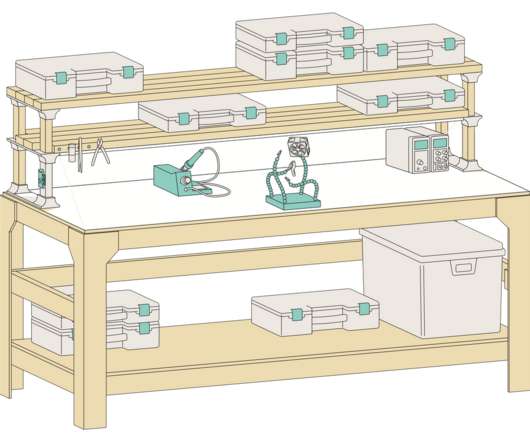
After some consideration, I purchased a 2x4basics custom workbench kit (which provides the bench's heavy-gauge structural resin supports) and lumber to form the main structure, and then cut slabs of chipboard to form a top and a bottom surface. The 2x4basics kit came with shelves, providing space for plastic storage boxes.
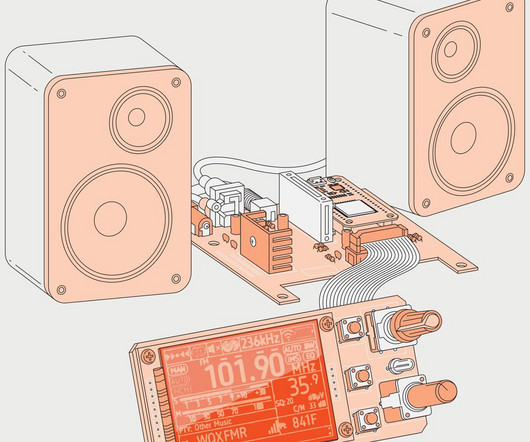
These contain a TEF6686 chip in a DIY-friendly package, suitable for through-hole soldering (the TEF6686 itself is a surface-mounted chip), and with radio-frequency shielding to help minimize interference. These modules are cheap—they can generally be found for around US $25.
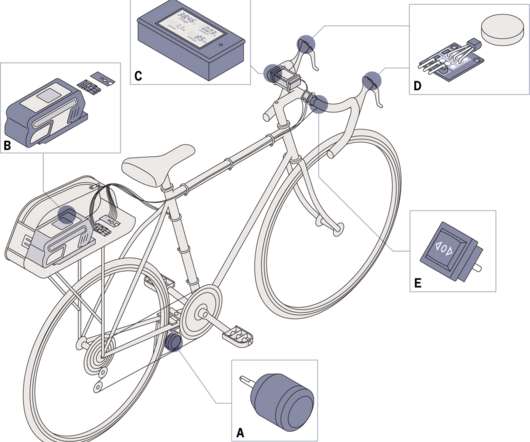
It is easy to convert your bicycle into an electric bike, but if you consider some technical things during selection of an electric bike kit than it will ease your journey to convert the bicycle into an electric bike & running it. Before going to find out the exact e- bike conversion kit or individual part you have to know about parts.
If you can build Lego and with the tech help and resources of this great DIY forum you can do it! Most conversion kits go for about $5000.00 - $8000.00. Make it your style, have fun and prove them all wrong. You deserve this. t forget to wave at all the non believers at the gas pumps. Eco Steve
The Galaksija is a Z80 -based, 8-bit DIY machine, cleverly designed so that its bill of materials meshed exactly with what a Yugoslavian was able to import from Western Europe. Figuring it was plain sailing from there, I canceled my Crowd Supply kit order and set off on my own.
It is easy to convert your bicycle into an electric bike, but if you consider some technical things during selection of an electric bike kit than it will ease your journey to convert the bicycle into an electric bike & running it. Electric bicycle conversion kits are generally divided into three types. Hub Motors.
You may find some local brand batteries starting from 35 INR but never go with a cheap battery only as per our opinion you may purchase from either amazon ,Robu or authenticate source. But if you are making a large project & requires no solder/ no spot welding for the battery kit you may find Here – [link]. Conclusion.
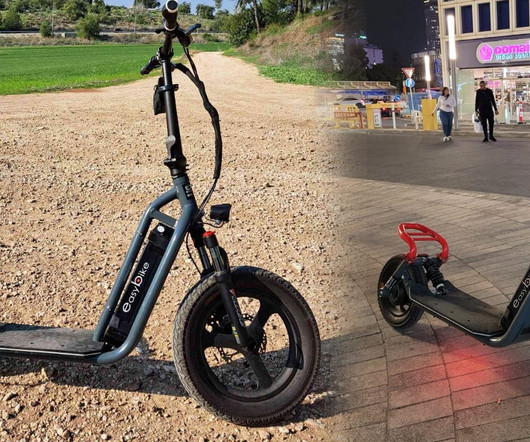
This isn’t just-for-show suspension like we’ve seen on plenty of cheap e-bikes and e-scooters. Next, this isn’t a cheap ride. So yeah, it’s not cheap. But the company invested in building something new, and innovation doesn’t come cheap. The current local price translates into around US $1,950.
I wasn't sure what I was going to do for balancing as anything on the market is not cheap. Dimitri and Jim have ordered their DIYkits and will hopefully have them up and running soon. It's been awhile since the last update but I've been busy on the next step in the project which is the cell balancers for the lithium cells.
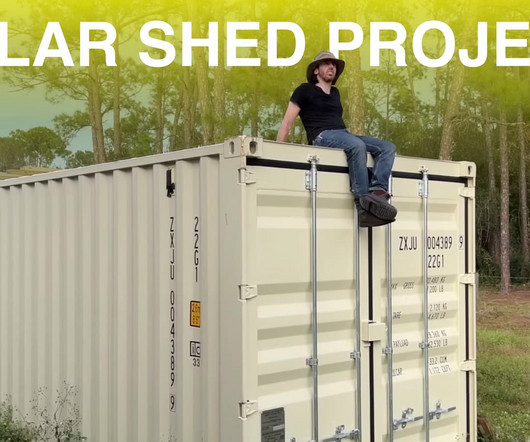
Well, not really cheated, but I just went with a retail solar generator system instead of DIYing that part myself from à la carte components. All of the panels are wired for the inverter/battery/charge controller gear (which is an all-in-one unit) and the kit includes all of the adapters. To be fair, I cheated a bit.
We organize all of the trending information in your field so you don't have to. Join 5,000+ users and stay up to date on the latest articles your peers are reading.
You know about us, now we want to get to know you!
Let's personalize your content
Let's get even more personalized
We recognize your account from another site in our network, please click 'Send Email' below to continue with verifying your account and setting a password.


Let's personalize your content